Definitive Guide to Seed Starting: Techniques, Tips, and Trade Secrets for Every Gardener
Created by a seasoned nurseryman, this comprehensive guide shares invaluable techniques and insider tips tailored for gardeners of all skill levels. Unlock the secrets to successful seed starting and watch your garden thrive with this treasure trove of professional knowledge and expert advice
Jonathan Burton
12/30/20249 min read
Starting seeds indoors opens up a world of gardening possibilities, giving you access to unique plant varieties and setting the stage for healthier, more vigorous growth. Beyond that, it’s your ticket to extending the growing season—kickstarting your plants indoors ensures they’re ready to thrive the moment outdoor conditions are just right.
Want to get the timing perfect? Use a last frost date calculator to pinpoint when it’s safe to plant outdoors and a planting calendar to plan your indoor seed starts. By thinking ahead and incorporating succession planting, you can enjoy fresh harvests all season long. Whether you’re aiming for earlier blooms, continuous crops, or just a stronger, more productive garden, starting seeds indoors is the first step. Click here to find your last frost date.
Click here to find a Planting Calendar for your area.
Dive into this guide to discover the essential steps and expert tips that will make your garden flourish from the very beginning!
Getting Started: The Fundamentals
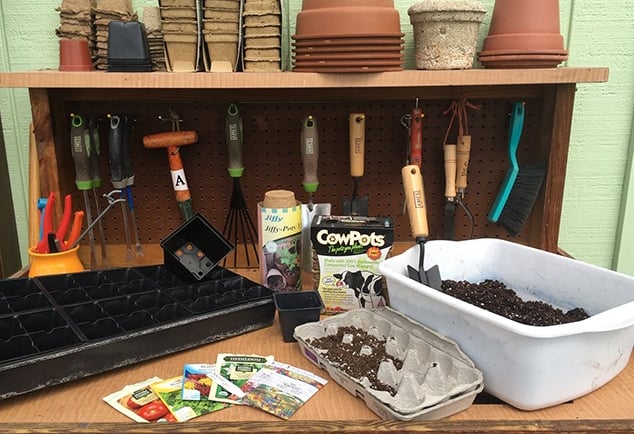
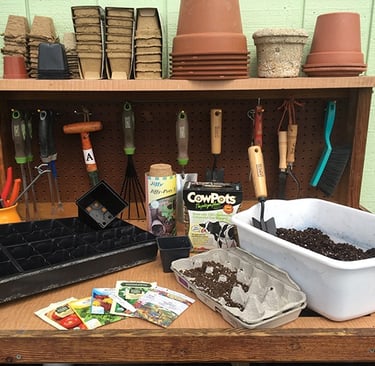
Starting seeds indoors is an exciting journey that sets the foundation for a successful garden. Before you begin, it's important to have the right tools and materials ready. Here’s what you’ll need:
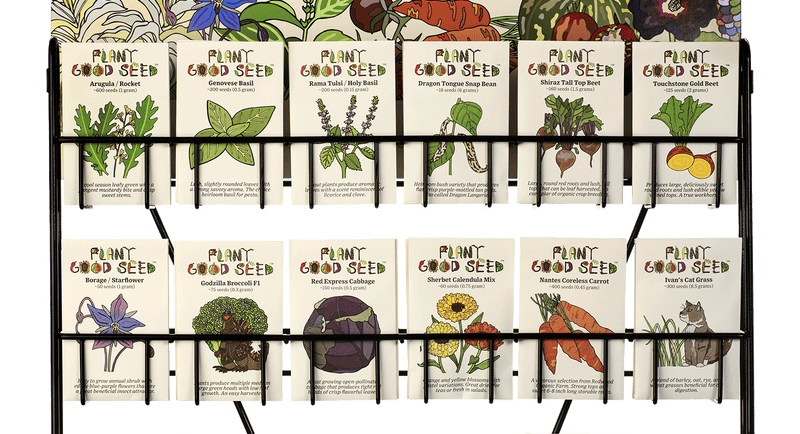
1. Seeds
The heart of any garden is the seeds. Choose varieties that match your climate and growing conditions, and don’t hesitate to experiment with unique options you won’t find at your local nursery. When you source seeds from a trusted supplier, you’re investing in quality and better success rates for germination.
2. Containers
Choosing the right kind of containers can be a game-changer. Look for choices that work with your setup and your dedication to sustainability:
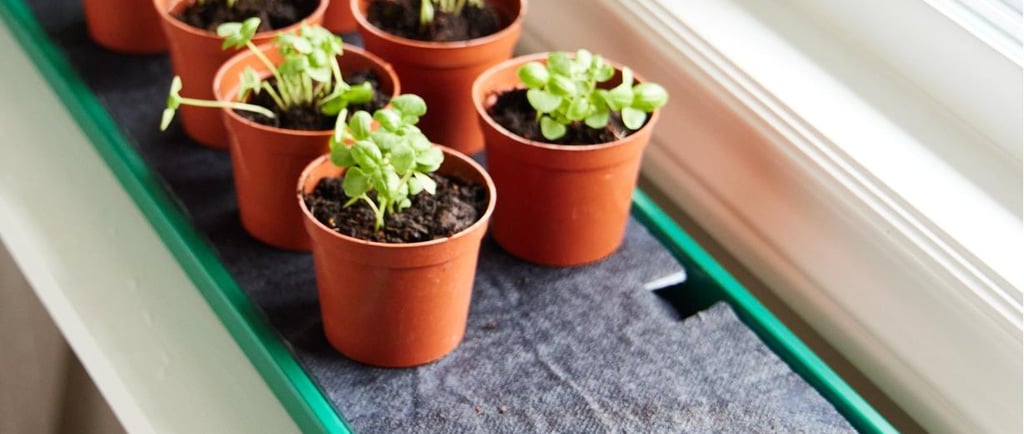
Seed-Starting Trays or Pots: These are tried and true classics. Just be sure they’re draining well so water isn’t sitting in the pot.
Rockwool Cubes: Ideal for hydroponics, providing a perfect balance between moisture retention and aeration.
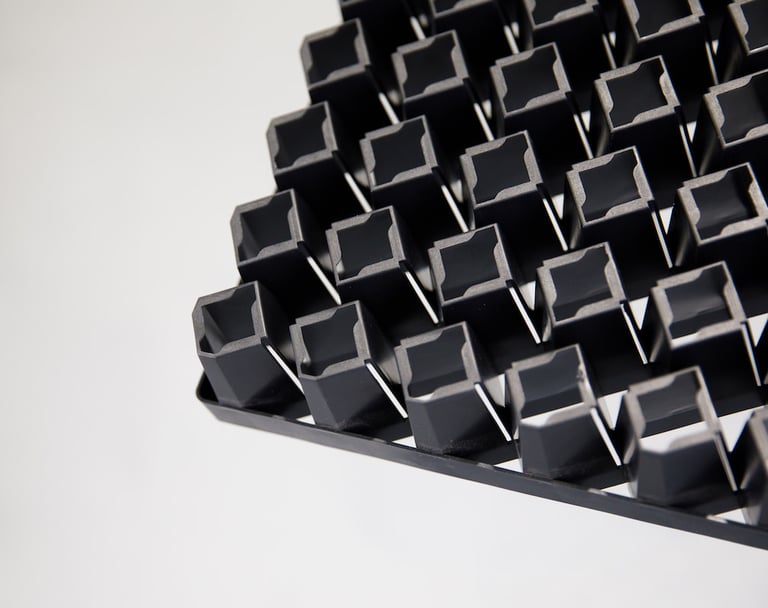
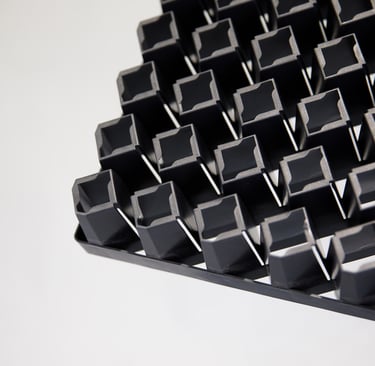
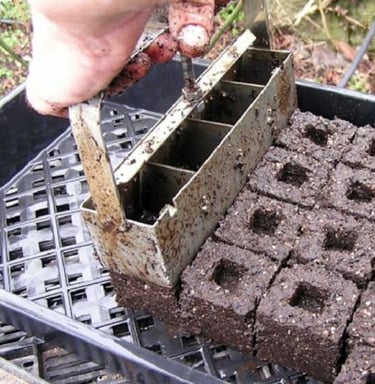
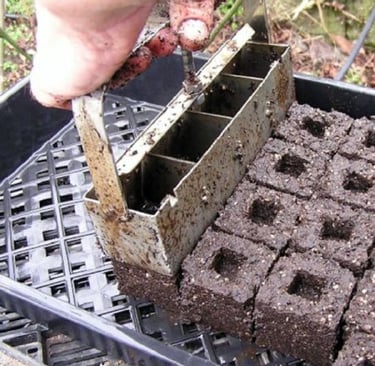
Soil Blocks: Reduce plastic waste, minimize transplant shock, and are easy to make using a soil blocker tool.
Biodegradable Pots: Biodegradable pots are made from natural materials, like peat, coconut coir, or paper, which makes it possible to plant the whole pot directly into the soil with less waste and root disturbance.
Pro Tip: Soil Blocks or biodegradable pots make a great plastic free option for your plants.
.
3. Soil
To avoid the risk of damping off, avoid regular potting soil and go for a light, fluffy seed-starting mix. This soil type makes the ideal environment for germination for your seeds providing the balance they need between moisture retention and aeration. Click here to See Our DIY Soil Recipes
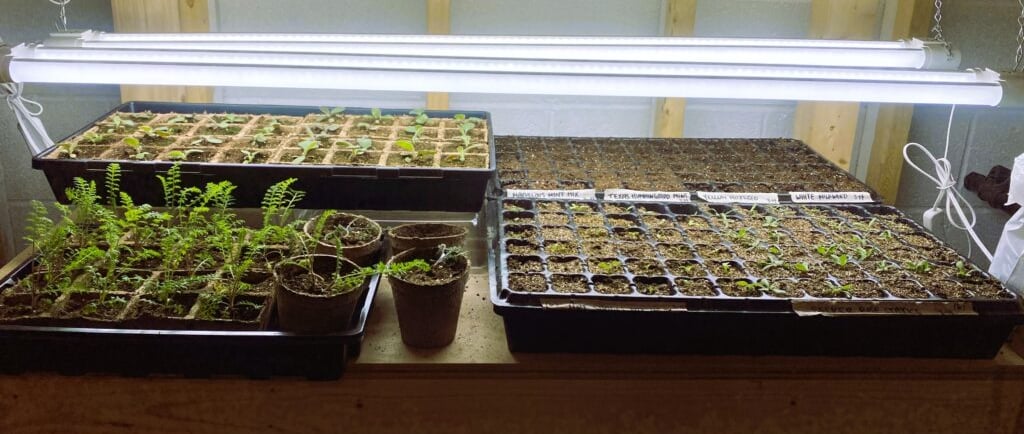
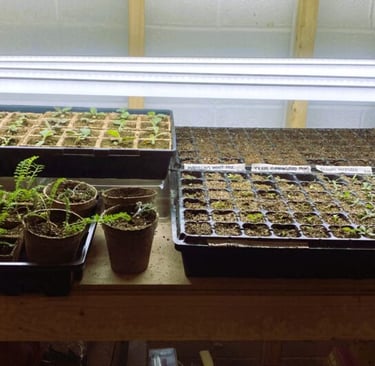
4. Light
Emerging seedlings are sun Hungry, they truly require vast amounts of light to mature strong and healthy. If you have a sunny window, that’s a good start, but add grow lights if you want the best growth. Put them 2–4 inches above your seedlings to deter legginess and promote stocky, vigorous growth.
5. Water
Seedlings thrive in consistently moist soil, but overwatering can spell disaster. A gentle spray bottle works wonders for small containers, or try bottom-watering—setting trays in a shallow pan of water to let the soil absorb just what it needs.
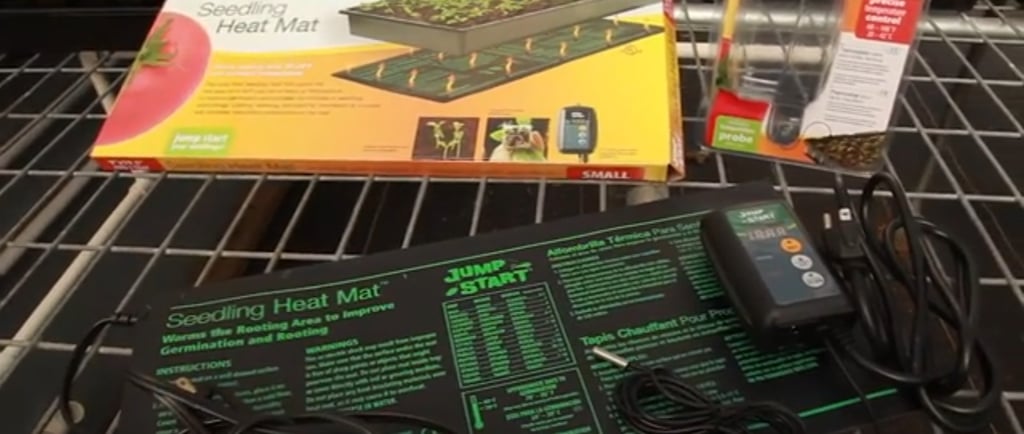
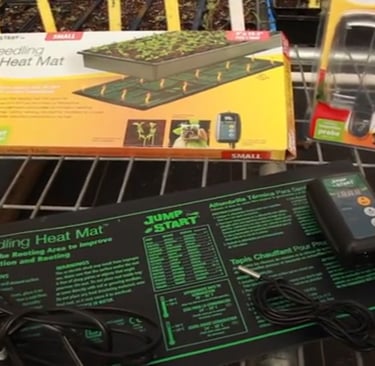
6. Heat Mats
Many seeds germinate better in warm soil. Heat mats provide the ideal root-zone temperature for quicker sprouting. For extra efficiency, you can place a foam pad or insulation under the mat to keep temperatures uniform and energy use low. For added precision team your heat mat up with a Digital Thermostat Controller to set the precise temperature for your seeds to have optimal germination.
7. Make A Breeze With Fans
Ever notice how plants outside grow thicker stems? That’s thanks to the wind. Imitate that by putting an oscillating fan close to your seedlings to stimulate sturdy growth.
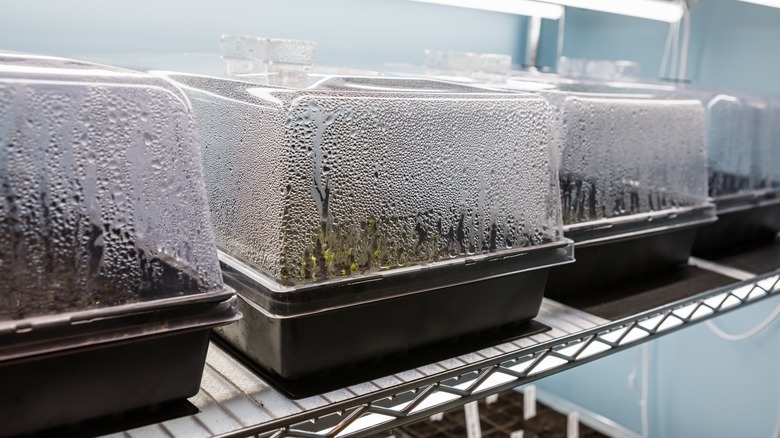
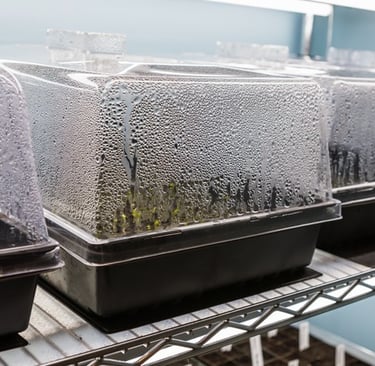
8. Humidity Domes
Clear plastic humidity domes act like mini-greenhouses for the seedlings. They seal in moisture, making a warm, humid environment that’s ideal for germination. Just remember to take off the dome once your seedlings germinate to prevent issues with mold or fungi.
Avoiding Damping-Off Disease
Damping-off is every gardener’s worst nightmare — it comes on fast and can decimate whole trays of seedlings. The good news is that it can be prevented with a few easy precautions:
Use sterile seed-starting mix to minimize pathogens.
Avoid overwatering; keep the soil moist but not saturated. Consistency is key for success!
Remove humidity domes as soon as seedlings emerge to avoid fungal issues.
Give your plants good airflow by using a fan to reduce humidity around seedlings.
Lightly cover the seeds with vermiculite to help absorb excess moisture.
Clean & sanitize all tools, trays, and containers before planting. This will ensure that they are not harboring any pathogens. This can be done by soaking them in a 1:9 bleach water mixture for 10 minutes. Then simply rinse & allow to air dry, then get planting.
Note you can also use natural alternatives such as a 3% hydrogen peroxide or a 1:1 vinegar-water mixture can also be used instead of bleach.
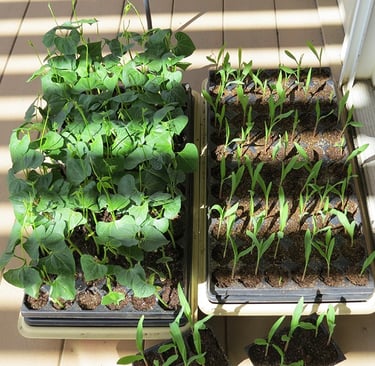
Step-by-Step Seed Starting Process
Now that you got your equipment set, it’s time to roll up your sleeves and get planting!. Here’s how to get started:
Fill Containers
Fill your containers of choice with seed-starting mix. Making sure not to pack it too tightly—a light & fluffy soil gives seeds the best chance to sprout and spread those roots. Make sure to leave a little space at the top to prevent soil from spilling over when you water.Plant Seeds
Check the instructions on the back of your seed packet to follow the recommended planting depth, which is usually about twice the seed’s width. Place the seeds in the soil, then gently cover them, then lightly pat the surface. One of the biggest mistakes gardeners make is planting seeds too deep. This can prevent seeds from having enough energy to make it to the surface after germinating. So resist the urge to bury them too deep!Vermiculite Seed Topper
After planting, sprinkle a fine layer of vermiculite over the seed cell. This acts as protective layer that helps retain moisture and reduce fungal issues. This simple addition can make a big difference in your germination rates.Labeling for a Pro-Level Seed Starting Experience
Now that you've planted your seeds, it's crucial to label them! Trust us, even seasoned gardeners mess up on this step. We all think we're going to remember exactly what varieties we planted and where but without proper labeling there's a good chance these details might slip her mind as time passes. So grab your copper labels, pencils or grease pens and start labeling those containers. To improve upon your planting procedure keep track of essential info like seed varieties, sowing dates, and germination times. Remember, staying organized is the secret to a successful and enjoyable seed starting journey!
Water Gently
Watering can make or break the seed starting process. Use a spray bottle to lightly moisten the soil without disturbing the seeds, or set the containers in a shallow tray of water so the soil can draw moisture from below then remove it from the watering tray a few minutes later when it's soaked up all it can holdProvide Light, Heat, and Airflow
Place your containers in a sunny location or under grow lights to ensure seedlings get 12–16 hours of light per day.Use heat mats to maintain optimal soil temperatures: 70–80°F (21–27°C) for most seeds or 80–85°F (27–29°C) for heat-lovers like peppers.
Position a fan nearby to mimic outdoor breezes. This not only strengthens seedlings but also improves air circulation to prevent disease.
Pro tip: Use a heat mat with a digital temperature controller for precise temperature control. Insert the probe into the soil to monitor conditions and make adjustments as necessary.
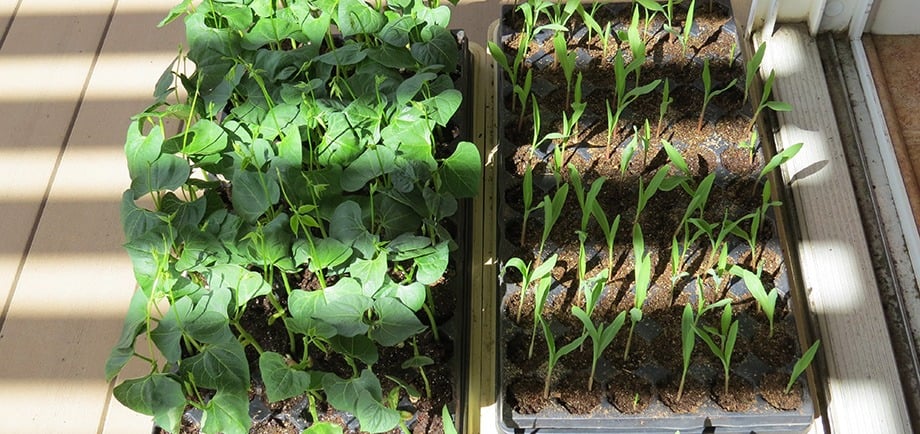
Monitor and Maintain
Check your seedlings daily to ensure they’re thriving. Once they sprout, remove any humidity domes and continue providing light, heat, and airflow. When the seedlings develop their first true leaves, they’re ready for the next stage!

Pro Tip: Use Capillary Mats for Consistent Moisture
If you find life is too hectic and you’re afraid to keep your seedlings hydrated, capillary mats can be a game changer.
Place the mat under your seed trays, ensuring the edges are submerged in water. The mat will wick moisture up, keeping the seed starting mix evenly moist without overwatering. So simply place your seed trays on the mat and let it do the work for you. It’s a great tool for gardeners with packed schedules or seeds that take longer to sprout.
Follow these steps and you’ll give your seedlings a fighting chance against this common issue.
Protection Your Investment
In addition to protecting your seedlings from the frost it is important to protect them from pests such as rodents and birds. You can use quarter inch hardware cloth as a physical barrier to keep pests away from your seed starts that you work so hard to plant. Also if planting inside another thing to watch out for is cats as they are always looking for a warm place to sleep which could include your seedlings on a heat mat.
Advanced Techniques for Experienced Gardeners
If you’ve mastered the basics and want to take your seed starting game to the next level, here are some advanced techniques to explore:
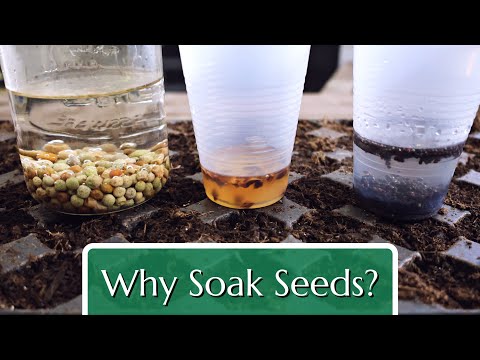
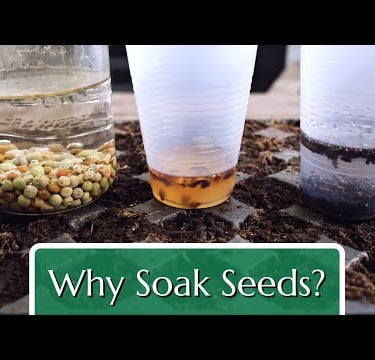
Pre-Soaking Seeds
Soaking seeds in warm water or chamomile tea for several hours will also help to break down the seed coats and expedite germination.
Alternatively, use a mixure of hydrogen peroxide (⅔ distilled water + ⅓ 3% hydrogen peroxide) for 15–30 minutes to eliminate pathogens and stimulate growth.
Seed Scarification
Hard-coated seeds, like morning glories, benefit from scarification. Gently rub the seed coat with sandpaper or a file to help water penetrate and trigger germination.
Stratification
Some seeds need a cold period to sprout. For these you need to simulate winter by storing seeds in moist soil in the refrigerator for a few weeks before planting.Fertilizer
Once your seedlings have their first true leaves, you will be able to feed them a diluted liquid fertilizer so they grow.DIY Micro-Greenhouses
Create mini-greenhouses using clear plastic bins or purchased kits to maintain warmth and humidity for delicate seedlings.
A
Pruning for Bushier Growth
Want fuller, bushier plants instead of narrow whips with little to no branches? Prune just above where you want the branching to start in order to encourage branching and develop stronger root systems.Plant Growth Regulators (PGRs):
Try gibberellic acid or other substances to aid germination in problematic seeds.Biochar Inoculation
For example: Pre-inoculate biochar with beneficial microbes before adding to your seed-starting mix to help increase soil fertility and water retention.Transplanting & Potting Up
If seedlings outgrow their containers, transplant them into larger pots filled with well-draining soil.Beneficial Microorganisms
Inoculate the root zones of seedlings with mycorrhizal fungi or nitrogen-fixing bacteria to boost nutrient uptake and resilience.
Hardening Off: Getting seedlings ready for the outside world
While it’s exciting to put your seedlings outside, a bit of preparation now can go a long way in their success. Hardening off is the process of slowly introducing your seedlings to the outdoors.
Start Slowly
Start by putting your little plants outside for only a few hours each day. Pick a mild or cloudy day so you don’t traumatize them with too much sun or wind.Increase Exposure Gradually
For a week or two, extend the time they’re outside and let them get some direct sunshine and breezy conditions.Protect Young Plants
Use of shade cloths or windbreaks to protect seedlings in the first stages of hardening off.Monitor & Water
Temperatures outdoors can dry soil quickly, so check moisture levels and water as necessary.
Starting seeds indoors isn’t simply a task of growing plants, it is the act of fostering the future of your garden from the ground up. With a bit of planning and care, you’ll be primed for a season of abundant growth, harvests and gardening triumph.
Happy Planting!I